What is a LUT?
A LUT (Look-Up Table) is a table that maps each input color to a different output color. In video editing, LUTs are commonly shared as .cube files and used in two roles: conversion (technical) LUTs that turn Log footage into Rec.709, and creative Look LUTs that give footage its style.
What is a conversion LUT?
A conversion LUT, also called a technical or Input LUT, transforms footage from one color space to another. The most common case is converting a specific camera’s Log profile and gamut to Rec.709 so the image displays with normal contrast and saturation. It is built for one specific input, so a LUT for one camera’s Log cannot be used on every Log clip, and it is applied at the strength its provider specifies. If your editor’s color management already converts the footage, do not add a conversion LUT on top.
Input LUT vs. Look LUT
A .cube file can describe a technical conversion or a creative look; the extension alone does not tell you which. Check the provider’s description for the expected input and output color spaces.
- Input LUT: a technical transform, such as a specific camera Log/gamut combination to Rec.709.
- Look LUT: a creative treatment of contrast and color. Some expect Rec.709; others expect a particular Log encoding.
For a Look LUT designed for Rec.709, a typical sequence is source → conversion to Rec.709, if needed → Look LUT. A color-managed editor may already perform the conversion. Do not add a second one. A LUT that combines conversion and a look must be used according to its provider’s instructions.
How to apply a LUT in five steps
- Identify your source. Check the camera profile, gamut, and the editor’s interpretation of the clip. A flat-looking image alone is not enough to identify Log footage.
- Read the LUT’s requirements. Match both gamut and gamma. A LUT designed for one camera’s Log profile is not a universal conversion for every Log clip.
- Set up one conversion path. Use your editor’s color management or the appropriate technical LUT. If the image is already in the color space expected by the Look LUT, skip an extra Input LUT.
- Apply the look and compare. Correct exposure and white balance in the appropriate stage of your editor’s pipeline. Start with the Look LUT at its intended strength, then reduce the creative intensity if needed. Keep a technical conversion at its specified strength.
- Check several frames before export. Compare skin, skies, highlights, and shadows. Recheck the final result in the editor with the intended output settings, rather than judging only an exported screenshot.
Where to start in Adobe Premiere
Premiere distinguishes technical Input LUTs and Creative Looks in Lumetri Color. Check the clip and sequence color-management settings before adding a conversion LUT; your footage may already be transformed. For current controls, see Adobe’s custom LUT guide and color-management guide. Menu locations depend on your version.
Compare the original, Input-only, and Input + Look
Keep the frame and technical conversion fixed when comparing creative LUTs. Otherwise you may choose a brighter frame or a different conversion rather than the better look.
| Stage | What to check |
|---|---|
| Original | Exposure, white balance, and source interpretation. A Log original is not the final display reference. |
| Input only | Check the technical baseline before adding a style. Unexpected clipping or color shifts can indicate a source/LUT mismatch. |
| Input + Look | Compare the creative treatment against Input only. Look for lost detail, unnatural skin, and inconsistent results across shots. |
Preview and compare LUTs on a Mac with LUTScope
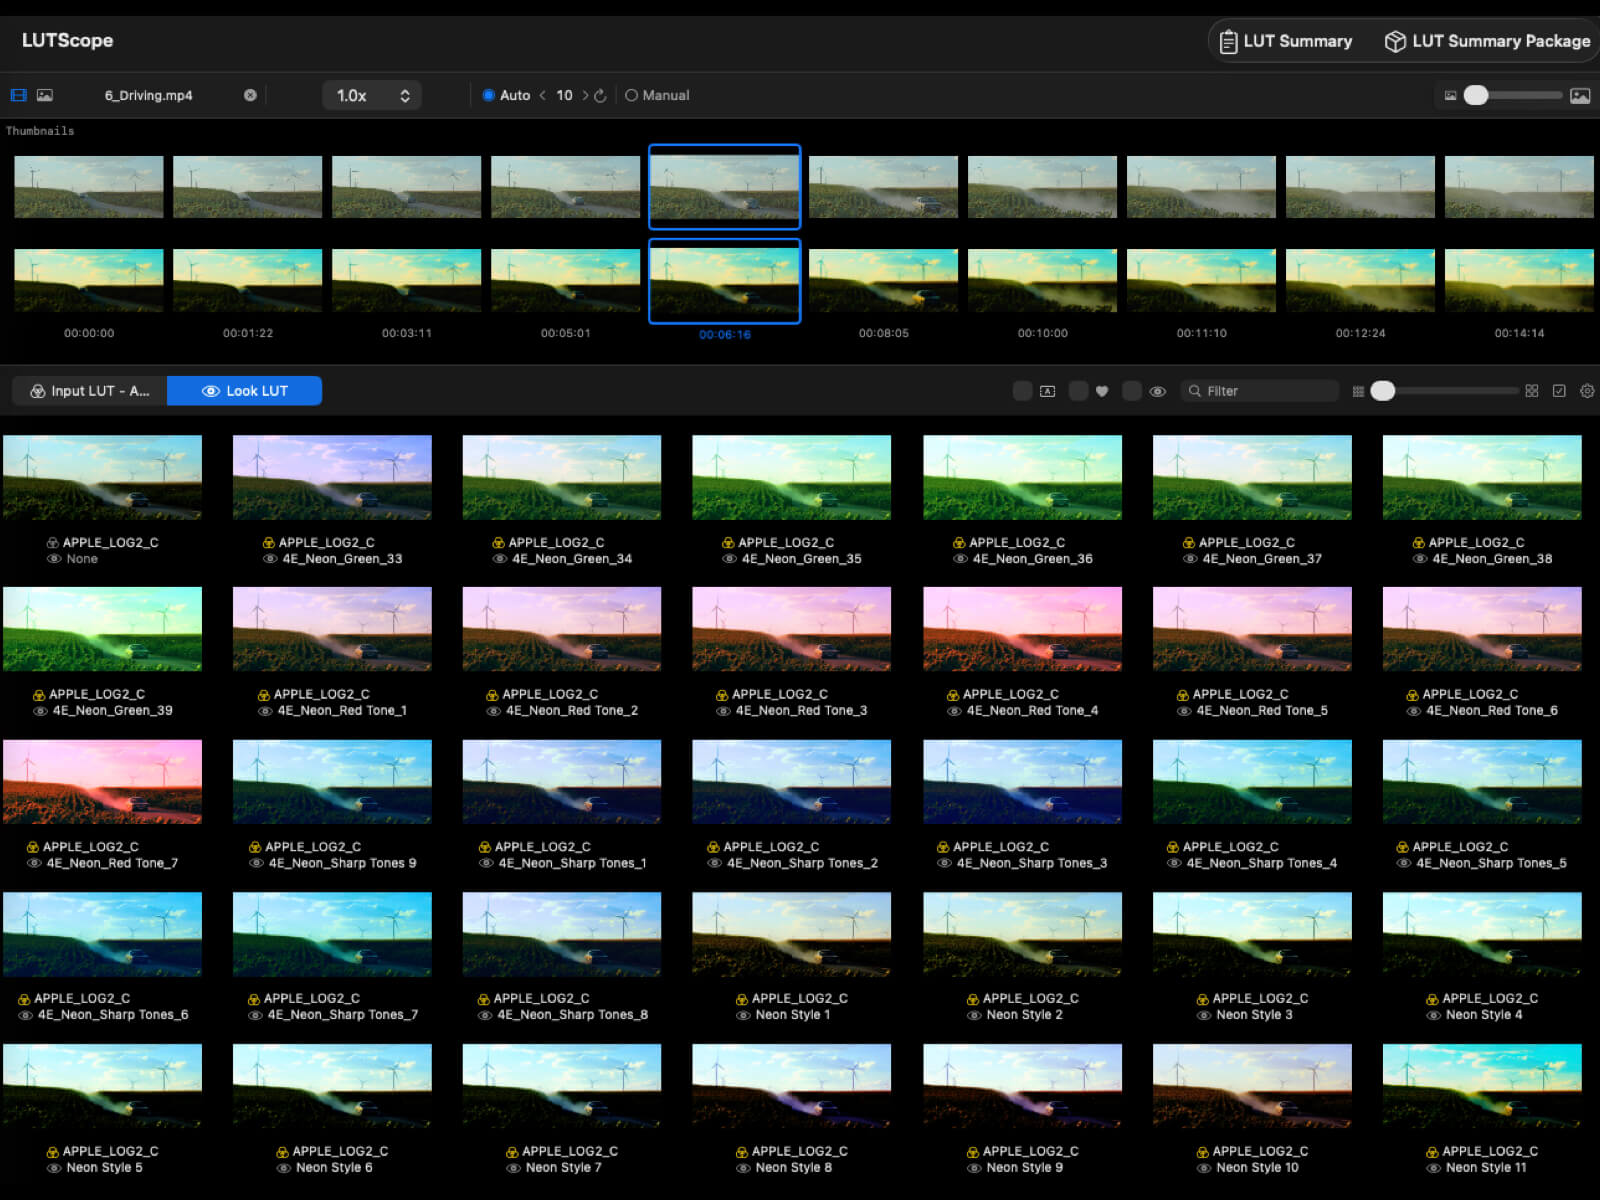
LUTScope helps narrow down your existing LUT collection before you finish the grade in an editor. It supports .cube files, a grid preview, and up to 20 comparison slots.
- Register your Input and Look folders. Supply your own LUT files; LUTScope does not include a LUT library.
- Import supported footage or a still and select a representative frame. Check the import restrictions below first.
- In the Input / Look pipeline, choose an Input only when the imported values require that conversion. For an already normalized Rec.709 source and a Rec.709 Look, set Input to None.
- Use the LUT grid to shortlist looks. The None cell in the Look tab is your Input-only reference.
- Assign finalists to the Compare window. Review Grid, Side by Side, or Slider views, and adjust creative intensity in Preview.
- Save your selection and export a LUT summary. Apply the selected LUTs in your editor and verify the final output there.
Import and output limits: LUTScope’s documented video input is SDR Rec.709 (bt709); stills use sRGB. HDR, BT.2020, and unknown video color spaces are rejected. An Input LUT does not override those import checks. Prepare unsupported source footage in your editor with proper color management, then avoid converting it again. LUTScope is for relative comparison, not color-accurate final monitoring or master QC. See supported formats.
Why does my LUT look wrong?
| Symptom | Check first |
|---|---|
| Too much contrast or saturation | Check for double conversion, a mismatched input color space, or a creative look that is too strong. |
| The image stays washed out | Check whether a required Log conversion is missing. Do not assume that every Look LUT includes it. |
| Skin or neutral objects change color | Check white balance and source/LUT compatibility before trying to fix everything with the intensity slider. |
| The preview differs from the editor | Compare source interpretation, transform order, output color space, and display settings. Different rendering pipelines need not match pixel for pixel. |
| The file will not import | Check the media color space and LUT format. Renaming an HDR file or changing its metadata is not a color conversion. |
Do I always need both an Input and a Look LUT?
No. Already normalized footage can use a compatible Look on its own. A technical conversion can also be used without adding any creative LUT.
Can a LUT fix underexposed footage?
It cannot recover detail that was not captured. Correct the source where possible and judge the look on more than one shot.
For app controls, continue to the LUTScope manual. To get the app, compare the App Store subscription and direct purchase.